July 2003
August 2003
September 2003
Preparing Site
ATL Composites – Order
October 2003
Shed floor
Builder’s Risk Insurance
Dispatched
Paving of shed floor completed
Shed roof
Delivery – Composite Boat Building Kit and Materials
Boat in a box
Shed roof problem
November 2003
Shed design
Z-Press collection
Airlie Beach
Halcyon
Adventures of a z-press
No time to be idle
Pressing and Cutting Panels
Starting the Starboard Hull
Boat building apprenticeship
Z-Pressing
Airconditioned shed!
December 2003
Wet layups
Fillets
Cake Icing?
Outahia
The Work Area
Cyclone threat
Cyclone preparation
Very wet….
Ex-tropical cyclone Debbie
February 2004
Starboard Hull Turning
Binary’s length
March 2004
Shed too low
Taping outside starboard hull
Moving port hull panels
April 2004
Toilets
Marking sacrificial keel
Raising the shed roof
May 2004
July 2004
October 2004
What happened to the project?
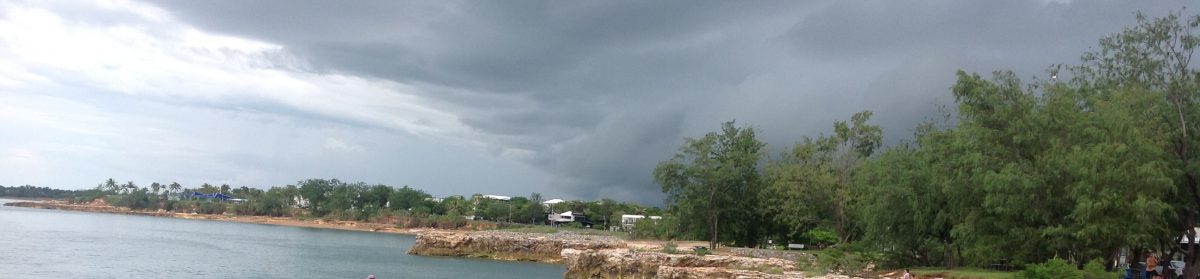
First storm for season
Dipped in chocolate
November 2004
Finally – One Hull Shell!
You should work on the boat everyday…
Port Hull – Preparation
Port Hull – Laying the Keel Panel
Storm Damage to Our Boat Shed
Repairing and Raising the Boat Shed Roof… Again
December 2004
Port Hull – Bilge Panels
Port Hull – Joining Hull Panels: Fillets, Wet Layup of Glass Tapes, Peel Ply
Now we have a 13.5 metre canoe
How to Fit a Bloody Big Sheer Panel Alone
Nocturnal Catamaran Building
Funny who you bump into whilst on holidays…
January 2005
New Year Resolution No 1 – Build some more boat!
Port Hull – Chamfer and Bridgedeck Panels
The Hull – Swim Platform Join
Tarp City
Port Hull – Bulkheads
Port Forebeam Bulkhead
February 2005
Port Horizontal Support Bulkhead
Tools used to build Binary
Peel Ply
Port Sail Locker Bulkhead
Port Front Structural Bulkhead
Port Chainplate Bulkhead
Turning the Port Hull Upsidedown
March 2005
Last week an earthquake, now a cyclone!
Checking for any weather damage
Post Cyclone Ingrid
Why we can’t stay with the boat during a cyclone…
The project is back on course
May 2005
Peel Ply Removal Port Hull Underside
Preparing Concave Joins Port Hull Underside
Concave Joins Port Hull Underside
Bilge Exterior Fillets Port Hull
Sanding Bilge Exterior Fillets Port Hull
June 2005
Finished Fillets External Bilge & Keel Port Hull
Reinforcing Tapes to the External Bilge & Keel Port Hull
Sacrificial Keel Port Hull
If I had a boat I should have gone sailing
July 2005
Creating the Fine Bow on the Port Hull
A Different Sailing Rig for Binary
September 2005
More of the Sacrificial Keel Port Hull
October 2005
Finishing the Port Hull Sacrificial Keel and Bow
Biaxial Glass Over Port Keel
Good excuse for not working on the boat today
November 2005
The Least Inspiring Aspect of Boat Building
More Fairing Compound
December 2005
January 2006
2006-01-16: Boat Fairing Methods and Tools
February 2006
2006-02-04: Copper Antifouling On Port Hull
March 2006
2006-03-27: Bridgedeck Support Beams
April 2006
2006-04-15: Our Catamaran Forebeam Stored Under House
2006-04-15: Preparing to fit the Bridgedeck Beam
2006-04-16: Duflex – Chine Join – Section Cut Away
2006-04-23: Guess What We’re Doing At The Moment
2006-04-25: Yet Another Cyclone – Severe Tropical Cyclone Monica
May 2006
2006-05-10: Pretty Maids All In A Row
2006-05-21: Preparing the Starboard Bridgedeck Beam
2006-05-20: Arrival of Nomen Cleats
June 2006
2006-06-13: Attaching the Starboard Bridgedeck Beam
2006-06-14: Sealing Port Bridgedeck Underside
2006-06-14: Final Hull Turning – Port Hull Upright
July 2006
2006-07-06: Aligning Binary Bridgedeck Halves For Joining
2006-07-17: Preparing to Tape the Bridgedeck Join
2006-07-11: Annual Oram Structural Inspection
2006-07-17: Taping the Bridgedeck and Structural Beams
2006-07-22: Video of Z-Pressing and Cutting Out Panels
2006-07-23: We Now Have A Boat
August 2006
2006-08-13: Stern Beam
2006-08-15: Stern Beam Preparation
2006-08-20: Reinforced Cut-outs
2006-08-20: My Version of a ‘Z Join”
September 2006
2006-09-03: Rear Lower Unidirectional Flange
2006-09-18: Taping The Back Web
2006-09-30: Aurora Binary
2006-09-30: Annual Pre Wet Season Shed Rebuild
October 2006
2006-10-01: Making the Rudder Bulkheads
2006-10-01: Why Tom Is Sobbing In The Corner
November 2006
2006-11-08: Colourful water tanks for Binary
January 2007
2007-01-14: Carbon masts for Binary
2007-01-22: Binary’s First Repair
2007-01-25: Chamfer Panels/SternBeam
February 2007
2007-02-12: Email from Alan – No 2
2007-02-12: Email from Alan – No 1.
2007-02-24: Rope work
March 2007
2007-03-26: Main Beam Lower Flange
2007-03-27: Video of Main Beam Lower Flange
April 2007
2007-04-07: Joining the main beam halves
2007-04-08: The Drunken Doorways
2007-04-10: Reinforcing Cutouts – Step 1
2007-04-13: Glass Ropes – Reinforcing Cutouts – Step 2
Video of Reinforcing Cutouts – Step 3 Taping
Video – Main Beam goes to the Boat
May 2007
2007-05-04: Main Beam Fitted
July 2007
2007-07-27: Main Beam Taping
2007-07-27: Carbon Masts – Update 1
August 2007
2007-08-25: Front Cockpit Dreaming
2007-08-25: Rudder Cassette Cutout
2007-08-26: Forward Tape – Forebeam Bulkhead
2007-08-26: Head Bulkheads – Remove and Reshape
2007-08-26: Stem Bulkhead to Bow
2007-08-26: Rear Beam – forward edge tape
2007-08-26: Bridge deck leading edge – support for kerfing
2007-08-27: Rear Beam Gusset
September 2007
2007-09-11: Beetles and Epoxy (Sub Locker Bulkhead)
January 2008
2008-01-03: Carbon Mast – Update 2
2008-01-06: Tropical Cyclone Helen
February 2008
2008-02-04: Homebuilt CVI Workstation holding @ -98.5KPa
2008-02-11: Controlled Vacuum Infusion
July 2008
2008-07-06: Bridge deck leading edge
2008-07-07: Forward Buoyancy Compartments 1
2008-07-14: Closing Voids – Buoyancy Compartments 2
2008-07-18: Forward mixing and wet out area
2008-07-18: Fitting the head bulkheads – again
2008-07-24: Completed void ledge used as template
2008-07-26: Auxilliary Propulsion
2008-07-30: The sail lockers have soles
2008-07-30: ….and the boatbuilder has soles
August 2008
2008-08-07: Top Bow Chamfer Panels, Designers and Builders
2008-08-14: Bridgedeck Leading Edge
2008-08-16: Reinforcing the kerfed leading edge
September 2008
2008-09-07: Preparing the Fore Beam
2008-09-07: Presenting the Fore Beam
2008-09-07: Stress testing the presented fore beam
2008-09-28: “Just lay some uni over it and tape the rest”
2008-09-28: The fit of the fore beam
2008-09-29: Beam insert panel on the top bow chamfer panels
October 2008
2008-10-02: Fore Beam Installed
2008-10-10: More Z joins as 5 years comes around
2008-10-28: Sail Locker Access Hatch Template
November 2008
2008-11-02: Sail Locker Access Hatch Cutouts
2008-11-07: A Grapple of Anchors
2008-11-09: The Hound and the Hatches
2008-11-15: Marinising the Waecos
2008-11-16: Mooring Cleats
2008-11-16: Forward Cleat Blocking
2008-11-16: Deck reinforcement for cleat mounting
2008-11-17: Forward cleat blocking – installation
2008-11-19: Hatching – slowly
2008-11-28: Bits of duflex to make a hatch or two
2008-11-27: More boat in a box
2008-11-29: Steering Unboxed
2008-11-30: Still Hatching
December 2008
2008-12-29: A lot of photos of those bloody hatches
2008-12-28: Engines in boxes
2008-12-31: Hatch Infusion Layup
2008-12-31: Infusing the Access Hatches
February 2009
2009-02-05: Tread and Shelf
2009-02-08: Hatches – only seals and external paint to complete
2009-02-09: Vacuum Bag Sealing Idea
2009-02-11: Composite Pad-Eyes
2009-02-12: Fiddly Bits
2009-02-14: The Painter
March 2009
2009-03-03: Draft plumbing design for Binary’s Lavac toilet
2009-03-08: Vacuum Infusion – details of our typical layup
2009-03-08: Jotun Imperite 300 and International Intergrip
2009-03-08: Coping with heat and humidity
2009-03-15: Front lockers finally finished
2009-03-21: More about our copper + epoxy antifouling
2009-03-24: Even bigger hatches
2009-03-25: Latch and hinge reinforcement
April 2009
2009-04-19: Flange on the Mast Beam
2009-04-21: What goes in must come out
May 2009
2009-05-09: No strip-planking on this boat
2009-05-11: Back yard windows
2009-05-12: So far with the even bigger hatches (engine access)
2009-05-14: Crocodile-proof foredeck access
2009-05-17: We are tired of climbing over the rear beam
2009-05-17: Is this normal?
2009-05-19: Now we can walk into the rear cockpit
2009-05-20: Last task for the day
2009-05-25: Aft bunk supports
2009-05-26: Stairway beams
2009-05-28: Overheads for the rear berths
2009-05-31: Aft central cleats
2009-05-31: Obverse, converse and reverse
June 2009
2009-06-02: Bonding the aluminium backing plates for cleats
2009-06-03: Now the kids can visualise their bedrooms
2009-06-16: Aft cabin in bandages
2009-06-17: The back cabin bulkhead (BCB) offered up
2009-06-18: Two for one furniture
2009-06-20: The wayward router and the cabin furniture
2009-06-23: Lift, Glue, Screw and Clamp
2009-06-24: Shoulder Exercise
2009-06-26: Roundovers and Roundovers
2009-06-27: Convex in the cockpit and concave in the beam
July 2009
2009-07-01: Ventilation and light
2009-07-06: Reinforcing the rear ventilation
2009-07-27: Ten (feeble) excuses
August 2009
2009-08-22: Dutch Door Basics
2009-08-19: The BCB Saga
2009-08-20: The BCB Cut-outs
2009-08-21: Catwalk Beam Tops
2009-08-23: Extending the short door
2009-08-25: Door Making
2009-08-29: The Second Wall
2009-08-30: Reinforcing for Door Furniture
2009-08-30: Trial Door Fitting
2009-08-31: The BCB changes the shape of Binary
September 2009
2009-09-20: Left hand $100 jigsaw, right hand $600 camera
2009-09-27: The catwalk beams are in
2009-09-28: H joins for the deck panels
2009-09-30: Head and Laundry Hatches
October 2009
2009-10-01: Water tank hatch basics
2009-10-02: Better core replacement
2009-10-03: Water Tank Hatch Doublers
2009-10-03: Almost finished the water tank hatches
2009-10-22: Sealing and painting under the foredeck panels
2009-10-23: Straps, holes and tie-downs
2009-10-25: Water tank bulkheads and paint
2009-11-28: Anchor Locker
2009-10-29: Anchor system basics
November 2009
2009-11-29: Plumbing through bulkheads
2009-11-29: The almost ready deck panels
December 2009
2009-12-01: Glue, glue everywhere and little on the job
2009-12-03: The fore decks are on
2009-12-04: Occupational Health and Safety Inspection
2009-12-13: Deck and companionway side panels
2009-12-23: Drivelines for Christmas
2009-12-25: Emperor Penguins and Christmas
January 2010
2010-01-26: Why are my conduit holes through the stern beam asymmetric?
February 2010
March 2010
May 2010
2010-05-16: We’re back blogging
2010-05-16: Stringer extensions within the aft beam
2010-05-17: Aft beam conduits
2010-05-17: Aft beam bulkheads
2010-05-18: Upper flange on the aft beam
2010-05-19: Top of the aft beam
Don’t Ditch The Duflex
2010-05-23: No cranes required to move this boat
July 2010
2010-07-23: The Move
2010-07-23: Binary in the Shed
2010-07-23: Companionway risers
2010-07-23: Companionway step reinforcement
2010-07-23: Companionway steps
2010-07-23: Quick visit to HCMC
2010-07-23: Whats happened to the BCB?
2010-07-24: Roof Panels
September 2010
2010-09-24: Bridge Deck Cabin, Saloon, Coach House, Turret, Pilot House
2010-09-26: The Third Roof Panel
2010-09-27: Cabin Side Walls
2010-09-28: Trimming the forward roof overhang
October 2010
2010-10-10: Prefabricating the front cabin walls
2010-10-11: Cutting and shaping panels
2010-10-14: Short tapes
2010-10-24: All Walls In
November 2010
2010-11-18: Preparing for the wet
January 2011
2011-01-02: 2010 in review
March 2011
2011-03-11: Four month hiatus
2011-03-11: Project cost
2011-03-24: Fresh water distribution
2011-03-28: Downloadable files have been updated
2011-03-31: A better head design for Binary
April 2011
2011-04-13: The most complicated schematic yet
2011-04-14: Adaptive Charging
May 2011
2011-05-02: Why don’t all bridgedeck catamarans have a front door?
2011-05-27: The front cockpit – port side wall
2011-05-27: The front cockpit – starboard side wall
2011-05-27: The front cockpit – back wall
2011-05-27: Glass bars
June 2011
2011-06-08: The front cockpit – preparing the floor
2011-06-08: The front cockpit – quadraxial suspension
2011-06-08: The front cockpit – floor drain
2011-06-08: The front cockpit – the floor doubler
2011-06-08: The shaft to gearbox coupling problem solved
2011-06-15: Composite chainplates
August 2011
2011-08-16: Catwalk beam flanges
2011-08-17: Fastening the catwalk
2011-08-17: Anchor rollers and Meccano sets
2011-08-17: Wrapping the forebeam
2011-08-17: Forestay chainplate – preparing the stand
2011-08-17: Forestay chainplate – the glass wraps
2011-08-22: Baby stay chainplate – preparing the stand
2011-08-22: Baby stay chainplate – the glass wraps
2011-08-22: Frames for the trampolines
2011-08-24: Anchor chain alignment
2011-08-24: Robust Simplicity and the Art of Motor Sailing
September 2011
2011-09-13: The chain way – eight holes
2011-09-13: The chain way – chainplate bulkhead
2011-09-13: The chain way – encasing the baby stay chainplate
2011-09-21: Drawing a large curved line
2011-09-21: The evolving shape of the trampoline frames
2011-09-28: Taping the trampoline frames
2011-09-28: Trampoline frames – core replacement
October 2011
2011-10-09: Blending the bow stem into the deck
2011-10-10: Finishing the trampoline frame edges
2011-10-10: Sealing balsa edges on the catwalk
2011-10-10: First storm of the wet season 2011-12
2011-10-11: Installing forward anchor rollers
2011-10-14: Work platforms, cheap tools and rounding of topdeck edges.
2011-10-16: And another curve is added …
2011-10-28: For (i = 1; i < smooth boat surface; i++) {bog; sand;}
November 2011
2011-11-10: A break from fairing
2011-11-09: Bob Oram’s website
2011-11-18: Early Christmas gift from the landlord
2011-11-23: Pinning the roof to its support poles – Part 1
December 2011
2011-12-03: Pinning the roof to its support poles – Part 2
2011-12-04: Securing the support poles to the back beam
A diversion: Tiny house building
January 2012
Christmas Cyclone
At last, someone will transport our boat
How to load a catamaran onto a truck without a crane
The Move #2
